Recent Posts
Why Trust the Pros: The Advantages of Hiring Experts for Fire and Smoke Damage Cleanup
4/8/2024 (Permalink)
 When it comes to fire and smoke damage cleanup, trusting the pros is the smart choice.
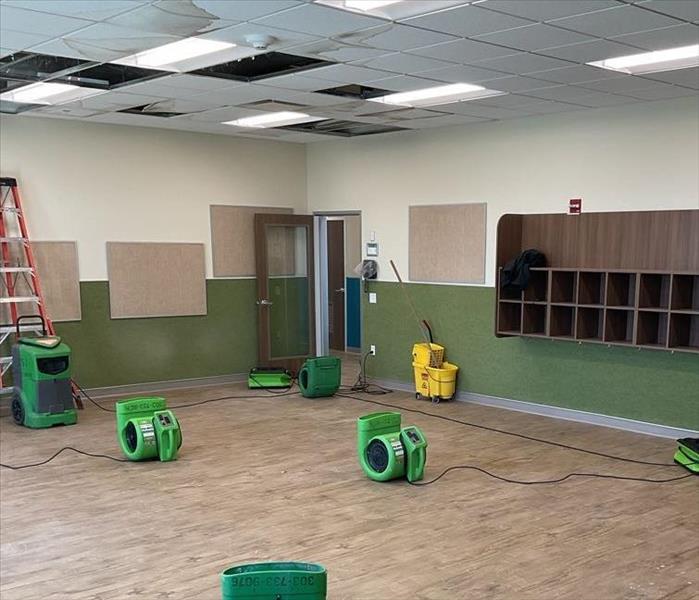
Dealing with the aftermath of a fire can be overwhelming, but hiring professionals for fire and smoke damage cleanup can make all the difference. In this blog, we'll explore the numerous benefits of entrusting this crucial task to experienced professionals. From thorough cleanup to specialized techniques, professional restoration companies like SERVPRO® are equipped to handle the challenges of fire and smoke damage with precision and expertise.
Expert Assessment and Planning
One of the key advantages of hiring professionals for fire and smoke damage cleanup is their expertise in assessing the extent of the damage and formulating a comprehensive restoration plan. Trained technicians conduct thorough inspections to identify all affected areas, including hidden smoke residues and structural damage. This meticulous assessment ensures that no aspect of the damage is overlooked, laying the foundation for effective cleanup and restoration.
Specialized Equipment and Techniques
Professional restoration companies have access to specialized equipment and techniques that are specifically designed for fire and smoke damage cleanup. From high-powered vacuums and air scrubbers to ozone generators and thermal foggers, these advanced tools are instrumental in removing smoke odors, soot residues, and other contaminants from the affected areas. Professionals also employ proven techniques such as dry ice blasting and hydroxyl generation to achieve optimal results.
Thorough Cleanup and Restoration
Fire and smoke damage cleanup requires more than just surface-level cleaning – it demands thoroughness and attention to detail. Professional restoration technicians are trained to address all aspects of the damage, from cleaning and deodorizing surfaces to repairing and restoring damaged materials. Their meticulous approach ensures that your property is restored to its pre-fire condition, with minimal disruption to your daily life.
Health and Safety Considerations
Cleanup efforts following a fire can expose individuals to a variety of hazards, including toxic smoke residues, mold growth, and structural instability. Professional restoration companies prioritize the health and safety of their clients by adhering to industry standards and safety protocols. They take precautions to minimize exposure to harmful substances and create a safe working environment for their technicians and occupants of the property.
Peace of Mind
Perhaps the most valuable benefit of hiring professionals for fire and smoke damage cleanup is the peace of mind that comes with knowing the job is being handled by experts. Professional restoration companies like SERVPRO of Denver East have the experience, resources, and dedication to deliver reliable results, allowing homeowners to focus on rebuilding and moving forward after a fire.
When it comes to fire and smoke damage cleanup, trusting the pros is the smart choice. From expert assessment and planning to specialized equipment and techniques, professional restoration companies offer numerous benefits that ensure a thorough and effective restoration process. By entrusting this crucial task to experienced professionals, homeowners can rest assured that their property is in capable hands, with the best chance of returning to its pre-fire condition. Don't hesitate to reach out today for assistance in cleaning up and restoring your property after a fire!
Mold in Your Attic: Causes, Signs, and Remediation Solutions
3/13/2024 (Permalink)
 Are you experiencing a musty smell in your home? You may have mold in your attic!
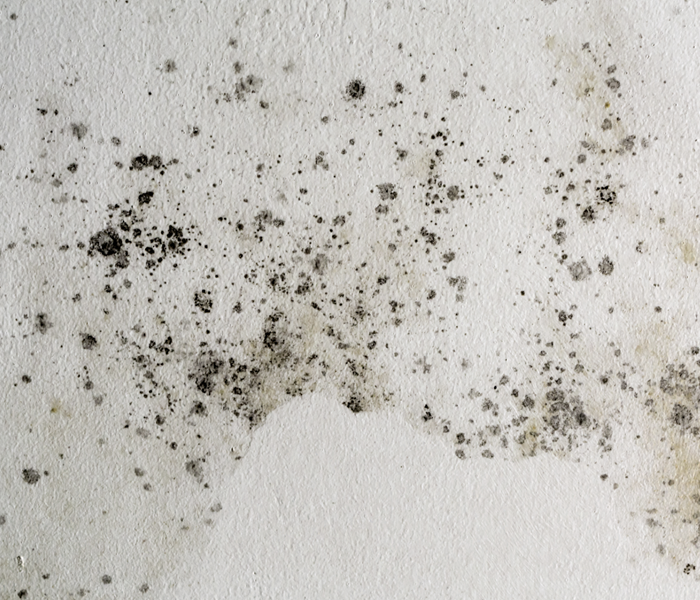
Are you experiencing a musty smell in your home? Have you noticed damp spots or discoloration in your attic? If so, your home might be suffering from mold damage, especially in your attic. Mold in the attic is a common problem, but it can be harmful to your home and family. In this article, we discuss the causes, signs, and remediation solutions to help you keep your attic – and home - clean and safe.
Causes of Mold in Attic
Mold growth thrives in moist and humid conditions. Your attic can provide the ideal environment for the mold to grow. Some of the contributing factors include:
- Roof leakage or Storm Damage: If there is an opening in your roofing, rainwater from storms can penetrate your attic, leading to moisture accumulation.
- Inadequate Ventilation: Poor airflow can cause moisture to build up, which can contribute to mold growth.
- Condensation and moisture: Moisture accumulation can result from, among other things, poor insulation, hot air from your heating system, or even humid air from your kitchen and bathroom.
- High humidity levels: High humidity results from damp basements or high condensation, leading to mold growth.
Signs of Mold in Your Attic
Detecting mold damage in your home can be daunting. Here are a few indicators you should observe to identify mold damage:
- Discoloration: Mold tends to grow in wet areas and usually appears as dark spots or patches on your attic walls and ceiling.
- Smell: A musty odor signifies the presence of mold in your attic.
- Visible growth: Greenish-black spores or visible mold may be seen growing on surfaces in your attic.
- Water damage: Water leaks or stains on the walls and ceiling indicate dampness or moisture accumulation that promotes mold growth.
Mold Remediation Solutions
If you detect the presence of mold in your attic, don't panic. With the following remediation solutions, you can effectively tackle mold growth in your attic:
- Inspect and Assess the Extent of the Mold Damage: Look at the extent of the damage to know the severity of the mold contamination in the attic.
- Determine the Source of Moisture: Identify the cause of the mold growth, such as roof leakage, high humidity levels, or inadequate ventilation.
- Experts evaluation: Seek the expertise of SERVPRO® professional mold remediation services. Our team will evaluate the mold damage and advise on how best to approach the problem, ensuring that you tackle the source of the moisture issue to prevent future mold growth.
- Removal of Mold-Damaged Materials: SERVPRO® experts will remove moldy materials damaged by moisture or water promptly.
- Cleaning and Treatment: SERVPRO® professionals will thoroughly clean and treat surfaces affected by mold growth, ensuring no traces of mold spores.
- Drying of Materials: Our experts will dry the materials affected by the mold growth to prevent future contamination.
Fight Against Mold Damage
Mold damage in your attic can be harmful to your home. Early identification and remediation of mold are the keys to avoiding disastrous effects. Keep an eye on any discoloration, water stains, or musty smells in your attic to detect the presence of mold. Address any moisture issues immediately and rely on SERVPRO® professional mold remediation services for a thorough evaluation of the mold damage. By working with our experts, you can ensure that your attic and entire home are safe and healthy environments to live in. Contact us to schedule your Mold Remediation appointment today!
How to Prevent Bacterial Growth After Water Leaks
2/14/2024 (Permalink)
 At SERVPRO of Denver East, our experienced team specializes in efficient and thorough water damage restoration.
Water leaks into your home or business is not only a hassle but can also pose risks due to potential bacterial growth. Whether from a burst pipe, flooding, or leaks, the aftermath of water damage requires swift action to prevent the proliferation of harmful bacteria. In this blog, we'll explore effective strategies to thwart bacterial growth after water intrusion, ensuring a safer environment for you and your loved ones.
Understanding the Risk: Bacterial Growth After Water Intrusion
When water infiltrates your property, it creates a breeding ground for various bacteria and microorganisms. These can include harmful pathogens like E. coli, Salmonella, and other potentially hazardous microbes. Factors such as standing water, elevated humidity, and organic materials like wood, carpeting, or drywall provide an ideal environment for bacterial proliferation.
Immediate Steps to Mitigate Bacterial Growth
Acting promptly after water intrusion is crucial in preventing bacterial growth. Here are essential steps to take:
- Safety First: Prioritize safety by turning off electrical sources in affected areas to avoid potential hazards.
- Prompt Water Removal: Begin water extraction and drying processes immediately. Use towels, mops, or wet/dry vacuums to remove standing water.
- Thorough Cleaning: Disinfect affected surfaces with a solution of water and a disinfectant approved by health authorities. Pay special attention to areas prone to moisture and organic material, such as carpets, walls, and furniture
Key Strategies for Preventing Bacterial Growth
- Ensure Proper Ventilation: Increase airflow by opening windows and using fans or dehumidifiers to aid in drying out the space.
- Thorough Drying: Completely dry affected areas within 48 hours to impede bacterial growth. Use industrial-grade drying equipment for larger areas.
- Professional Inspection and Restoration: Seek assistance from water damage restoration professionals like our SERVPRO® team to ensure thorough assessment, specialized equipment, and effective restoration techniques.
- Regular Monitoring: Continuously check for signs of moisture or mold growth, especially in hidden or less accessible areas.
Long-Term Protection: Maintenance and Prevention
After addressing immediate concerns, consider these preventive measures:
- Regular Inspections: Periodically inspect your property for leaks, cracks, or potential water entry points.
- Proper Insulation: Ensure proper insulation in areas prone to condensation or moisture buildup.
- Prompt Repairs: Address any plumbing issues or roof leaks promptly to prevent water intrusion.
- Education and Preparedness: Educate yourself and your family or employees about actions to take in the event of water intrusion to minimize risks.
Trust SERVPRO® for Expert Water Damage Restoration
At SERVPRO of Denver East, our experienced team specializes in efficient and thorough water damage restoration. Equipped with advanced technology and expertise, we mitigate water damage effectively, reducing the risk of bacterial growth and ensuring your property's safety. Call our SERVPRO® team for professional assessment and restoration services to protect your space against bacterial growth after water leaks!
Busting Lightning Myths: What You Need to Know
1/17/2024 (Permalink)
Lightning is a powerful force of nature that often comes with its fair share of myths and misconceptions. In this blog, we'll debunk five common myths about lightning to ensure you have accurate information and can take the necessary steps to stay safe during storms.
Myth 1: Lightning Never Strikes the Same Place Twice
Reality: Lightning can and does strike the same place multiple times. Tall structures, such as skyscrapers and communication towers, are more likely to be struck repeatedly. It's crucial to follow lightning safety guidelines, even if an area has been struck before.
Myth 2: Rubber Tires on a Vehicle Protect You from Lightning
Reality: While being inside a vehicle is safer during a lightning storm, it's not the rubber tires that provide protection. The metal frame of the vehicle diverts the lightning around you, creating a Faraday cage effect. However, avoid touching metal surfaces inside the vehicle during a lightning storm.
Myth 3: Lightning Only Strikes During Thunderstorms
Reality: Thunderstorms are the most common setting for lightning, but it can occur outside of a thunderstorm, too. "Bolt from the blue" lightning can strike many miles away from the storm itself. It's essential to be cautious whenever you hear thunder or see lightning, regardless of the immediate weather conditions.
Myth 4: You're Safe if Lightning Strikes Water
Reality: Lightning can strike bodies of water and travel through them, posing a threat to anyone in or near the water. If you hear thunder or see lightning, it's time to get out of the water and seek shelter immediately.
Myth 5: If It's Not Raining, There's No Danger from Lightning
Reality: Lightning can strike even when it's not raining. "Dry lightning" occurs when lightning is produced in a storm but doesn't reach the ground. These strikes can still pose a significant risk, especially in areas prone to wildfires.
Understanding the truth about lightning is essential for staying safe during storms. Don't fall victim to common myths—follow reliable safety guidelines to protect yourself and your property. For more tips on disaster preparedness and home safety, stay tuned to our SERVPRO® of Denver East blog. And remember, if your property experiences any damage due to storms or lightning, our expert team is here 24/7 to provide prompt and professional restoration services!
Battling the Blaze: Understanding the Dangers of Wildfires and Safeguarding Your Home
11/15/2023 (Permalink)
Wildfires are a devastating force of nature that can quickly engulf vast areas of land, destroying everything in their path. These intense fires pose a significant threat to both nature and human settlements. In this blog, we will address the dangers of wildfires and provide essential tips on how to prepare and protect your home from these destructive forces.
Understanding the Dangers
Wildfires can spread rapidly, driven by strong winds and dry conditions. They produce intense heat and generate thick smoke, making it challenging to escape their path. Aside from the immediate danger of flames, wildfires release toxic gases and harmful particles into the air, posing serious health risks to those in the vicinity.
Clearing Vegetation and Creating Defensible Spaces
Creating defensible spaces around your property is essential to protect your home from wildfires. Clearing away dry vegetation, such as dead leaves and branches, from the immediate surroundings reduces the fuel available to the fire. Maintain a minimum clearance of 30 feet around your home, ensuring that trees and shrubs are pruned and spaced apart.
Protecting Your Home's Exterior
Consider fire-resistant materials when building or renovating your home. This includes using non-combustible roofing materials and installing ember-resistant vents. Windows should also be made of safety glass or covered with fire-resistant shutters. Regularly clean debris from your roof and gutters to prevent ignition from embers.
Create a Fire-Safe Zone
Creating a fire-safe zone around your property is crucial. This includes using fire-resistant landscaping practices, such as planting fire-resistant plants and keeping grass well-maintained and watered. Implementing a strategic irrigation system and keeping flammable materials, like firewood, at a safe distance from your home can also reduce the risk of ignition.
Preparedness and Evacuation Plans
Stay informed about local wildfire risk and have an evacuation plan in place. Ensure that all family members know the plan and practice it regularly. Assemble an emergency kit containing essentials such as food, water, clothing, and important documents. Keep an eye on local weather and fire reports, and be ready to evacuate if authorities issue warnings.
Engage in Early Detection and Reporting
Remain vigilant and report potential wildfire hazards immediately to the appropriate authorities. Prompt reporting can lead to early intervention and containment, significantly reducing the potential damage caused by wildfires.
Remember, wildfires can be unpredictable, and it is crucial to prioritize the safety of yourself and your loved ones. Preparation, prevention, and staying informed are key to effectively protecting your home from these dangerous fires. By taking proactive measures and following the guidance provided, you can significantly reduce the risks associated with wildfires and be better equipped to face this natural disaster head-on.
The Science Behind Mold Growth: Ideal Conditions and Spores
10/19/2023 (Permalink)
 Mold growth can leave your home in a mess. Understanding the science behind mold can give you knowledge to proceed incase of mold damage.
Mold growth is a natural process that occurs in various settings. Understanding the science behind mold growth is essential for homeowners to prevent and address this common issue. In this blog, we will delve into the ideal conditions for mold growth and the role of spores, shedding light on the scientific aspects.
Ideal Conditions for Mold Growth
Mold thrives in specific conditions that provide the necessary factors for its growth. The primary requirements include moisture, a food source, and favorable temperatures. Mold prefers environments with high humidity—around 70% or more—combined with organic materials like cellulose (found in wood, fabrics, or paper) as its nutrient source. Furthermore, mold flourishes in temperatures between 68°F and 86°F. These ideal conditions create an environment where mold can rapidly reproduce and colonize.
The Role of Mold Spores
Mold spores play a crucial role in the life cycle of mold. These microscopic reproductive structures are present in the air both indoors and outdoors. Mold spores are carried through the air and can settle on surfaces. They can endure unfavorable conditions until they find an ideal environment to germinate and form new mold colonies. Spores are extremely resilient and can survive in various environments, allowing mold to spread and establish new growth areas, especially when the suitable conditions are met.
Factors Influencing Mold Growth
While moisture, food sources, and temperature are the primary factors that enable mold growth, other elements can also influence its development. Poor ventilation and inadequate air circulation contribute to trapped moisture, creating a more conducive environment for mold. Additionally, lack of sunlight or excessive shade can prevent surfaces from drying properly, promoting mold growth. Understanding these additional factors allows homeowners to implement preventive measures, such as improving ventilation, addressing water leaks promptly, and ensuring adequate sunlight exposure to inhibit mold formation.
Preventive Measures
By comprehending the science behind mold growth, homeowners can be proactive in preventing mold infestations. Regular inspection and maintenance play a vital role. Ensuring proper ventilation, especially in high-moisture areas like bathrooms or basements, helps reduce humidity levels and prevent mold growth. Promptly addressing any water leaks or intrusion prevents excess moisture buildup, while maintaining dry conditions discourages mold from thriving. Additionally, controlling indoor humidity levels with dehumidifiers and promoting proper airflow enhances mold prevention efforts.
Effective Remediation Strategies
In the event that mold growth does occur, understanding the science behind mold can also guide homeowners in implementing effective remediation strategies. It is crucial to address the underlying moisture issue that initially facilitated mold growth. This may involve repairing leaks, improving ventilation, or addressing any sources of excess humidity. When removing mold, proper containment and protection measures should be followed to prevent its spread to unaffected areas. Utilizing appropriate cleaning solutions and techniques, such as scrubbing with detergent or utilizing specialized mold cleaners, can help eliminate mold from surfaces. Regular monitoring and maintenance thereafter can help prevent future mold outbreaks.
Understanding the science behind mold growth equips homeowners with the knowledge to create an environment less conducive to mold development. By recognizing the ideal conditions, the role of spores, and the various factors that influence mold growth, individuals can implement preventive measures effectively, ultimately fostering a mold-free living space.
Restoration or Replacement: Making the Right Choices After Water Damage
10/16/2023 (Permalink)
 SERVPRO® of Denver East is here to assist you in restoring your belongings and property back to their pre-damage condition.
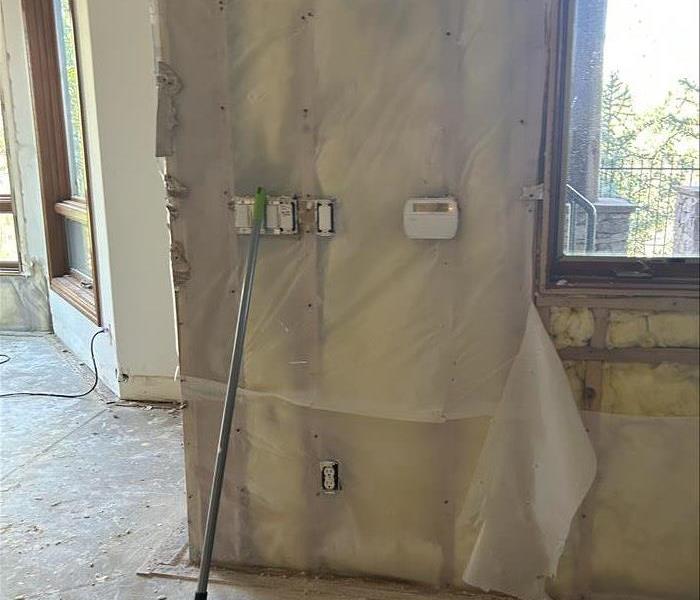
Water damage can be a common issue, often due to heavy rains, storms, or plumbing mishaps. When water intrusion strikes your Denver home or business, one of the critical decisions you'll face is whether to salvage or replace damaged items. In this blog, we'll provide valuable insights to help you make an informed choice.
Assess the Extent of Damage
Before making any decisions, assess the extent of the water damage. Some items may appear beyond repair at first glance but could potentially be salvaged with professional restoration services. Consider factors such as the type of water damage (clean water, greywater, or blackwater), the duration of exposure, and the material of the damaged items.
Prioritize Safety First
Your safety and that of your loved ones should always come first. Ensure the property is safe to enter and check for any electrical hazards or structural damage. Wear protective gear, including masks and gloves, when dealing with water-damaged areas.
Consult with Professionals
Engage the expertise of professionals, like SERVPRO® of Denver East, to assess the damage. Experienced restoration specialists can provide insights into which items are salvageable and which are not. They have the knowledge and tools to restore many items to their pre-damage condition.
Evaluate Sentimental Value
Some items may hold significant sentimental value, making them worth the effort and investment required for restoration. Consult with family members to determine the emotional importance of certain possessions.
Consider Replacement Costs
While restoring items can be cost-effective, it's essential to weigh the cost of restoration against the cost of replacement. In some cases, especially with readily available and affordable items, replacement may be the more practical choice.
Insurance Coverage
Check your insurance policy to see what is covered in terms of water damage restoration. Insurance may cover the cost of restoring or replacing damaged items, depending on your policy.
Prevent Future Damage
Once the decision is made to salvage and restore items, take proactive measures to prevent future water damage. Address any underlying issues that led to the damage, such as leaks or inadequate drainage.
Salvaging vs. replacing items after water damage in Denver requires a thoughtful evaluation of various factors, including safety, sentimental value, cost, and environmental impact. Seeking professional advice is crucial in making informed decisions. Remember, SERVPRO® of Denver East is here to assist you in restoring your cherished possessions and property to their pre-damage condition, ensuring that your Denver home or business can thrive once again.
Flood Preparedness - Prevention and Recovery
9/12/2023 (Permalink)
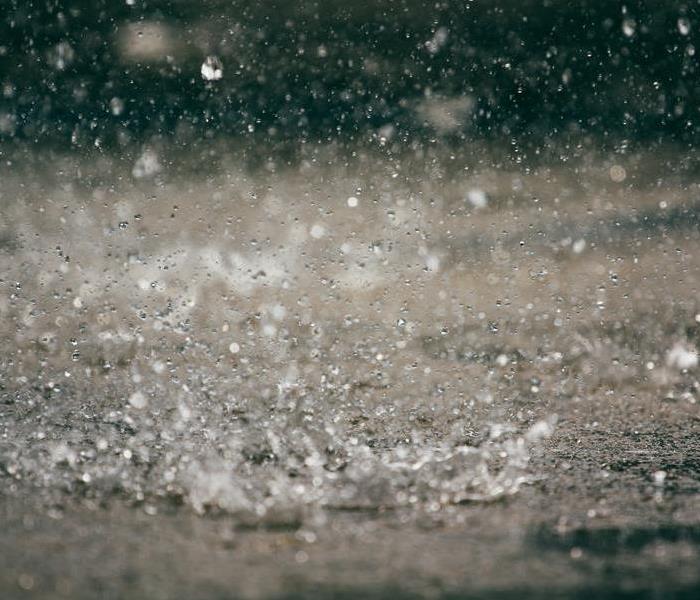 Be prepared incase of a flood. Take immediate action for proper mitigation.
The Pacific Northwest is known for its abundant rainfall, which can lead to flooding in certain areas. Flooding can cause extensive damage to homes and properties, disrupt daily life, and pose risks to personal safety. Being prepared for floods and knowing how to prevent and recover from them is crucial. In this blog post, we will explore flood preparedness strategies, including prevention and recovery, specific to the Northwest region.
Know Your Risk
The first step in flood preparedness is understanding the flood risks in your area. Check flood maps and consult with local authorities to determine if your property is located in a flood-prone zone. This information will help you assess the steps you need to take to protect your property adequately.
Standard homeowners' insurance policies typically do not cover flood damage. It is essential to purchase separate flood insurance to ensure that you are financially protected in the event of a flood. Contact your insurance provider to discuss your options and obtain the necessary coverage.
Protect Your Property
- There are several measures you can take to protect your property from flood damage:
- Elevate Electrical Systems: Raise electrical switches, sockets, circuit breakers, and wiring at least one foot above the projected flood level to prevent electrical damage and potential fires.
- Install Sump Pumps: Sump pumps can help remove water from your basement or lower level, reducing the risk of water damage.
- Seal Foundation Cracks: Inspect your foundation for any cracks and seal them to prevent water seepage.
- Clear Gutters and Downspouts: Regularly clean and maintain your gutters and downspouts to ensure proper water flow and prevent overflow that could cause water to enter your home.
- Install Backflow Valves: Consider installing backflow valves in plumbing lines to prevent sewage backup into your home during flooding.
Create an Emergency Kit
In the event of a flood, it is important to have an emergency kit readily available. Your kit should include essential items such as:
- Non-perishable food and bottled water
- Prescription medications
- Flashlights and extra batteries
- First aid supplies
- Important documents (insurance policies, identification, etc.) stored in a waterproof container
- Extra clothing and blankets
Develop an Evacuation Plan
Have a clear evacuation plan in place in case you need to leave your home during a flood. Identify evacuation routes, establish a meeting point for family members, and ensure everyone knows the plan. Stay tuned to local news and emergency alerts for the latest updates during a flood event.
Mitigate Flood Damage
If your property is impacted by flooding, it is important to take immediate action to mitigate damage:
- Turn off electrical power at the main breaker if it is safe to do so. Do not touch electrical equipment if you are standing in water.
- Remove water and dry out affected areas as soon as possible. Use pumps, wet vacuums, and dehumidifiers.
- Dispose of any items that cannot be properly cleaned or dried, as they may become breeding grounds for mold and bacteria.
- Consult with professionals for water damage restoration to ensure thorough cleanup and prevent future issues.
- Stay informed about flood alerts, weather conditions, and emergency instructions. Follow local news and official sources for updates. Consider signing up for emergency alerts through your local government or emergency management agency.
By being prepared and taking preventive measures, you can minimize the impact of floods on your property. In the event of a flood, take immediate action to mitigate damage and consult with professionals for proper cleanup. By being proactive, you can protect your property and ensure the safety of yourself and your loved ones during flood events in the Northwest.
Fire Detection and Suppression Systems: Enhancing Fire Preparedness for Your Company
8/14/2023 (Permalink)
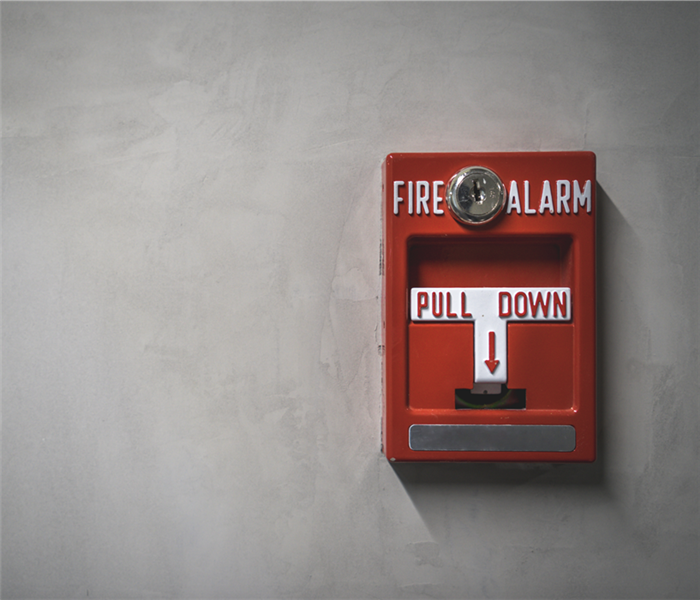 Investing in fire detection and suppression systems is an integral part of enhancing fire preparedness for your company.
When it comes to protecting your company and its assets, fire preparedness is of utmost importance. Fire detection and suppression systems play a vital role in mitigating fire risks and minimizing potential damage. In this article, we will explore the significance of fire detection and suppression systems, their key components, and how they enhance fire preparedness for your company.
The Importance of Fire Detection Systems
Fire detection systems are the first line of defense in identifying fire incidents early on. They provide prompt alerts, allowing for quick response and evacuation, reducing the potential for injuries and property damage. Installing a reliable fire detection system is essential for enhancing fire preparedness.
Types of Fire Detection Systems
- Smoke Detectors: These systems detect smoke particles and trigger alarms. They are widely used and highly effective in detecting fires, especially in areas with smoldering fires or slow-burning materials.
- Heat Detectors: Heat detectors sense rapid increases in temperature and activate alarms. They are ideal for environments where smoke detectors may trigger false alarms, such as kitchens or dusty areas.
- Flame Detectors: Flame detectors use sensors to detect the presence of flames, providing early warning in situations where smoke or heat detectors may not be as effective.
Fire Suppression Systems
Fire suppression systems are designed to control or extinguish fires automatically. They can significantly limit fire spread and damage, enhancing safety and minimizing downtime. Some commonly used fire suppression systems include:
- Sprinkler Systems: Sprinkler systems activate when heat triggers the sprinkler heads, releasing water to suppress or extinguish the fire.
- Clean Agent Systems: These systems use specialized gases or chemicals to quickly suppress fires while minimizing damage to sensitive equipment or assets.
- Foam Systems: Foam-based systems create a blanket-like layer over the fire, suppressing flames and preventing re-ignition.
Integrating Detection and Suppression Systems
To maximize fire preparedness, it is crucial to integrate fire detection and suppression systems. When a fire is detected, the system can automatically activate the appropriate suppression system, providing an immediate response and increasing the chances of successful fire containment.
Maintenance and Testing
Regular maintenance and testing of fire detection and suppression systems are essential for ensuring their reliability. Schedule routine inspections, detector calibration, and system checks to identify any potential issues and ensure that the systems are in optimal working condition.
Compliance with Regulations and Standards
When installing fire detection and suppression systems, it is vital to comply with local fire safety regulations and industry standards. Engage professionals who are knowledgeable about the specific requirements to ensure proper system design, installation, and ongoing compliance.
Employee Training and Awareness
While fire detection and suppression systems are crucial, it's equally important to educate employees about their functionality, evacuation procedures, and the proper use of fire safety equipment. Conduct regular fire drills and training sessions to enhance employee preparedness and response in case of a fire emergency.
Investing in fire detection and suppression systems is an integral part of enhancing fire preparedness for your company. These systems provide early detection, swift response, and effective fire suppression, minimizing the potential for injuries, property damage, and business disruptions. By integrating these systems, conducting regular maintenance, complying with regulations, and educating employees, you can significantly improve your company's ability to handle fire incidents and protect the well-being of your employees and assets. Prioritize fire safety and be proactive in implementing robust fire detection and suppression systems for a safer and more secure workplace.
6 Things You Should Know About Water Damage
7/18/2023 (Permalink)
Water damage is a common and often devastating occurrence that can wreak havoc on homes and businesses alike. Understanding the key aspects of water damage is crucial for prompt and effective mitigation. In this blog, we will explore six essential things you should know about water damage, equipping you with the knowledge to take immediate action and minimize the impact of such incidents.
Water Damage Can Occur Anywhere
Water damage is not limited to areas prone to flooding or extreme weather. It can happen in any location and for various reasons, such as plumbing failures, roof leaks, appliance malfunctions, or even human error. Being aware of the potential risks and taking preventive measures is essential to protect your property.
Act Quickly to Mitigate Damage
Time is of the essence when it comes to water damage. The longer water sits, the greater the damage becomes. Promptly addressing the issue by shutting off the water source, removing standing water, and initiating the drying process can significantly reduce the extent of damage and prevent secondary issues like mold growth.
Water Damage Extends Beyond the Visible
While the immediate signs of water damage may be evident, such as wet floors or soaked furniture, there could be hidden damage as well. Water can seep into walls, flooring, and structural components, leading to structural instability and potential health hazards. Professional assessment and moisture detection tools are necessary to identify and address hidden water damage.
Contaminated Water Poses Risks
Not all water is the same when it comes to damage. Contaminated water, such as sewage backups or water from natural disasters, can contain harmful bacteria, viruses, or chemicals. This type of water damage requires specialized cleanup procedures to ensure the safety of occupants and prevent the spread of disease.
Restoration Requires Professional Expertise
Proper water damage restoration goes beyond just drying out the affected areas. It involves thorough cleanup, decontamination, structural repairs, and addressing any mold or mildew growth. Engaging the services of a professional disaster restoration company ensures the restoration process is done correctly, minimizing long-term damage and health risks.
Insurance Coverage and Documentation
Water damage can be a costly affair, but insurance coverage may help mitigate the financial burden. It is essential to understand your insurance policy's coverage for water damage and document the incident thoroughly with photographs, videos, and written descriptions. Promptly filing a claim and providing accurate documentation can expedite the reimbursement process.
If you encounter water damage in your home or business, it is crucial to contact a professional disaster restoration company like SERVPRO of Denver East. Our experienced team is equipped with the knowledge and resources to handle all aspects of water damage restoration, providing you with peace of mind during the recovery process.
For expert water damage restoration services, contact SERVPRO of Denver East. We are available 24/7 to assist you in times of water damage emergencies.


 24/7 Emergency Service